Build a campaign
The campaign builder from start to finish, in five steps, from naming the campaign to signing it and sending it to our team for review.
New campaign opens the campaign builder. It walks you through five steps: Name, Audience, Voice and message, When and Review. At the end you sign the campaign and send it to our team. Nothing goes out until our team has reviewed it.
Before you start
Your sign-in email is confirmed. Until it is, the builder shows Verify your email to open the builder. See Confirm your email.
Your wallet holds credits. With an empty wallet the builder shows Add credits to launch campaigns and a Buy a bundle button. A team seat sees Ask the workspace owner to add credits instead: only the owner buys credits. See Buy credits.
Your business is in Canada. Campaigns go to Canadian numbers only. See Across Canada.
You have a list of at least 25 contacts who gave their permission. See Prepare your list.
Open the builder
Select New campaign in the top bar.
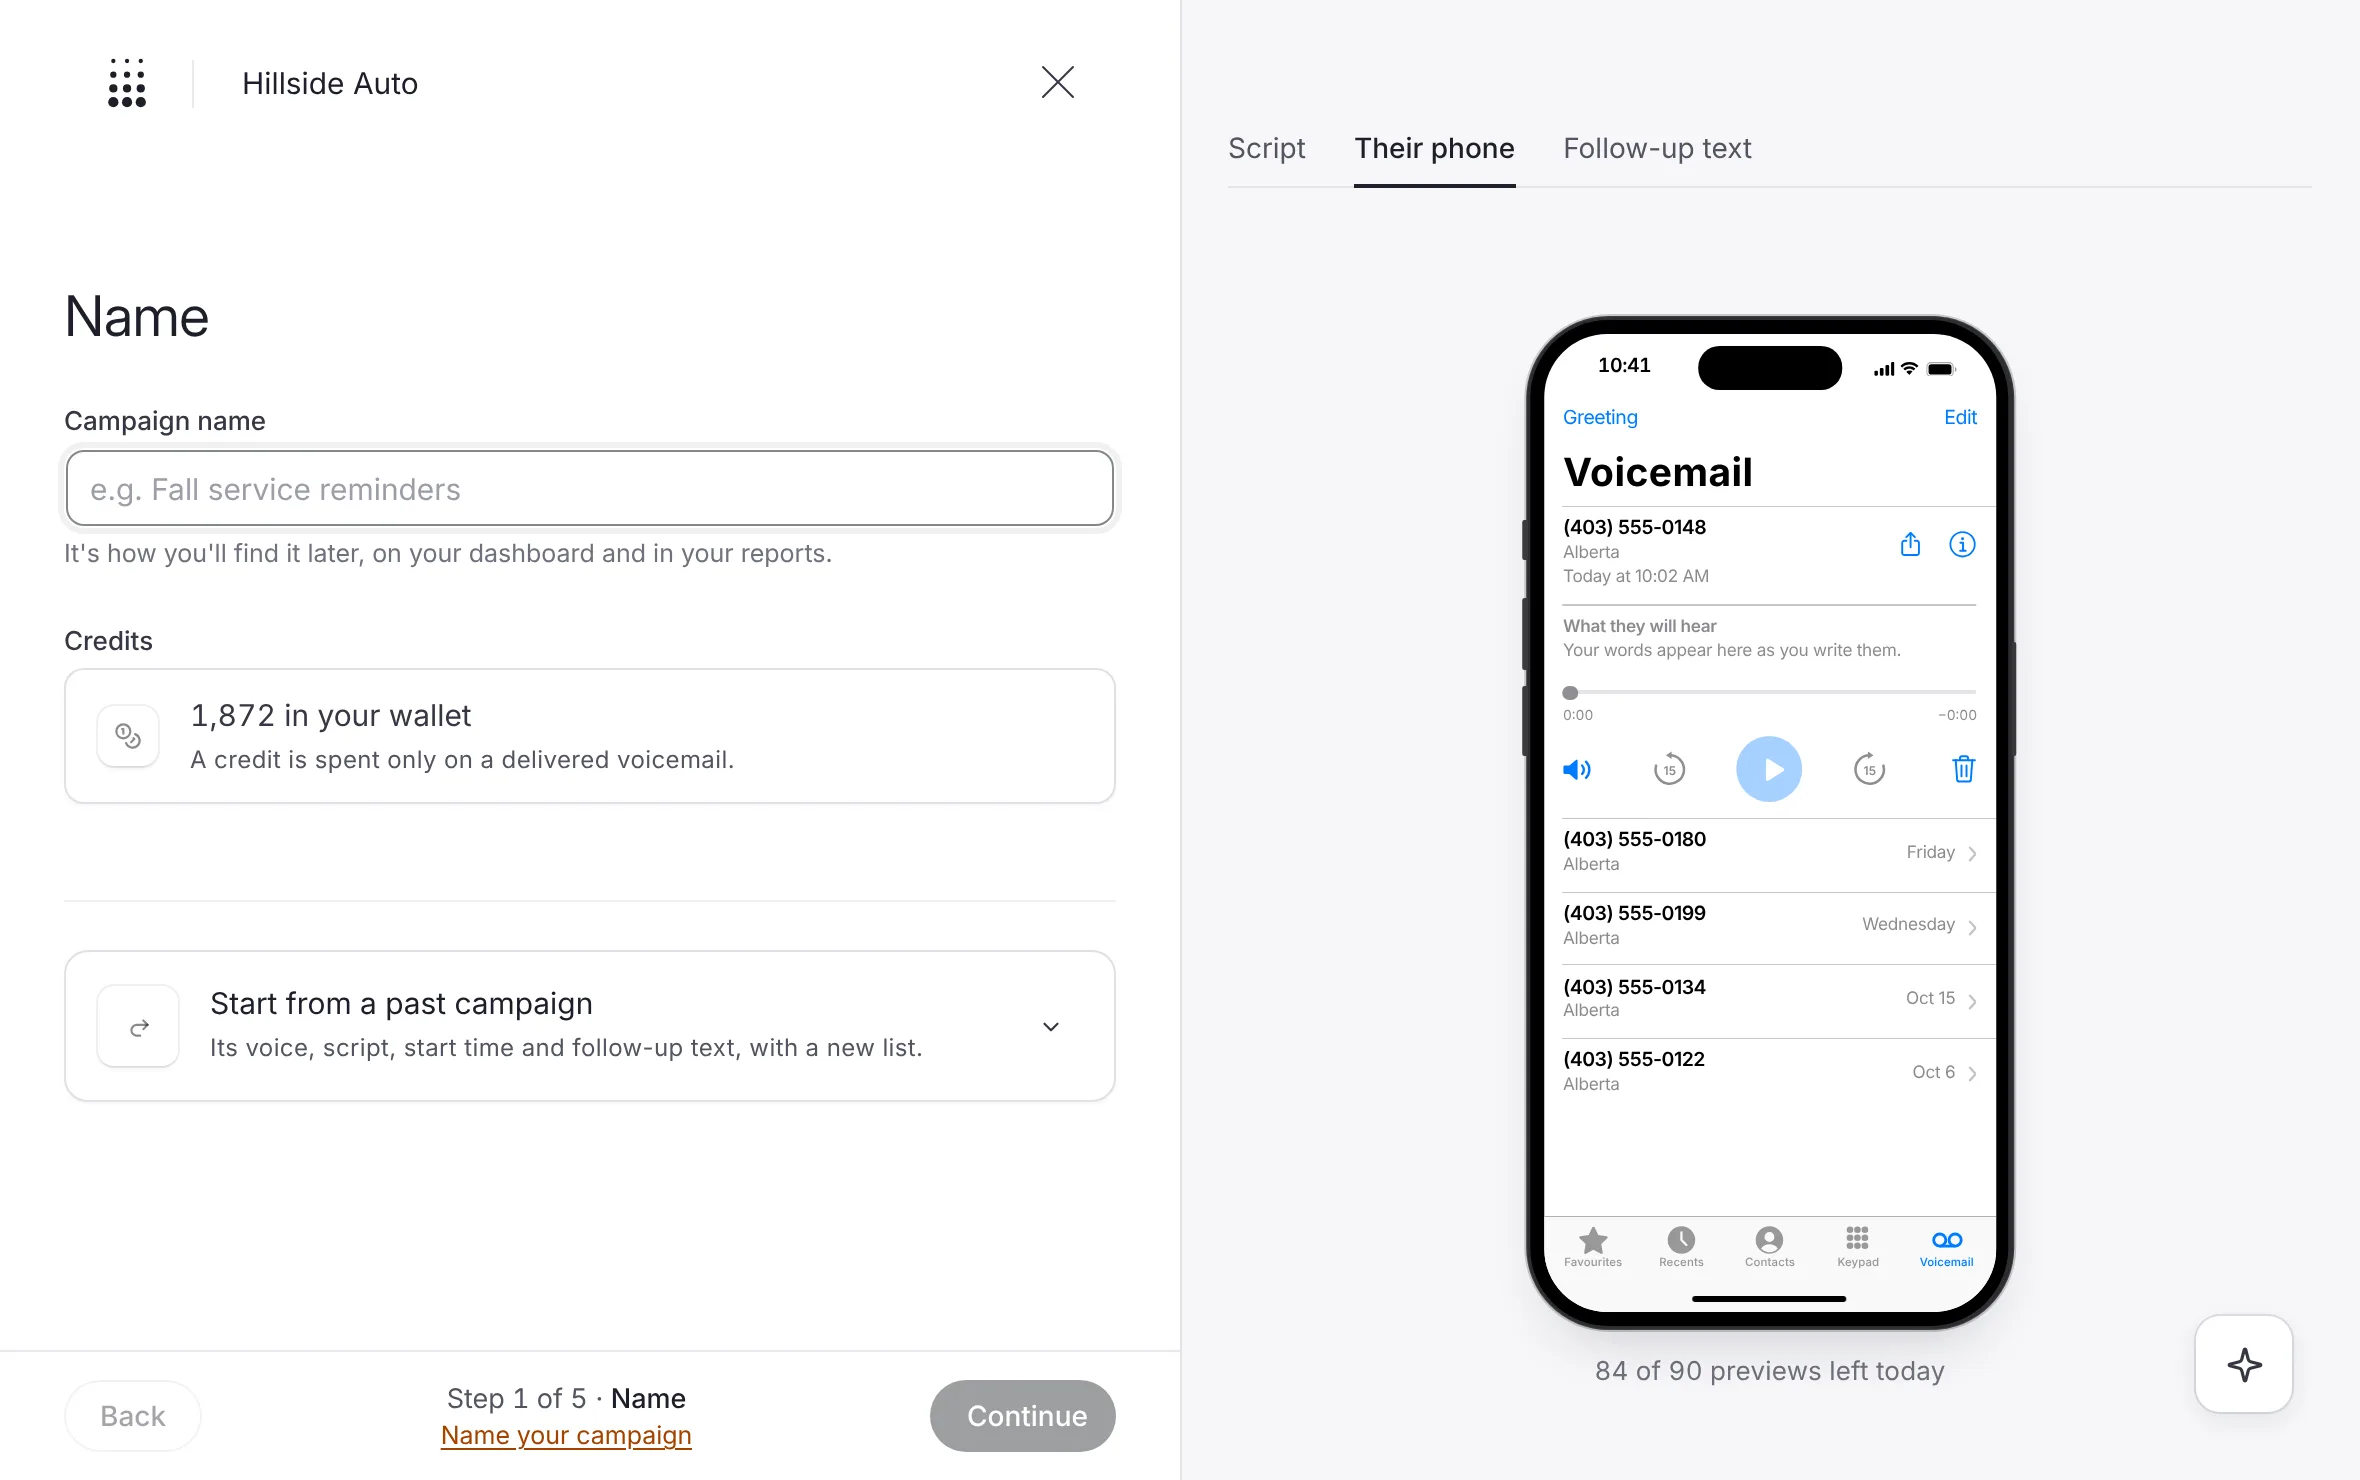 Example
What you see
The builder fills the screen. On the left, the five steps. In the middle, the step you are on. On the right, a preview of what your contacts get. At the foot, Back and Next.
Next stays grey until the step is complete, and the first thing still missing shows beside it. Steps you have finished stay open in the list on the left: select one to go back to it.
Step 1: Name
Type a name in Campaign name. It is how you find the campaign later, on your dashboard and in your reports.
Under Message, choose A message for each lead or One take for everyone. Both cost the same. See Message modes.
Check Credits. It shows what your wallet holds, and that a credit is spent only on a delivered voicemail.
To reuse an earlier campaign, open Start from a past campaign and pick one of your recent campaigns. It copies the voice, the script, the start time and the follow-up text. You still add a new list.
Select Next.
What you see
After you pick a past campaign, a line starts "Copied from" and names what was copied. If you had not typed a name yet, the campaign takes the past campaign's name with today's date.
Step 2: Audience
The Audience step has three parts: Upload, Map and Review.
Drag your file onto Drop your list here, or select Choose a file. CSV or Excel, up to 20 MB and 10,000 rows. Download the template gives you a sample file. See Upload a list.
On Map, check what each column is used for, and untick Include for a column your script will not use. See Match your columns.
On Review, read how many contacts are Ready and how many are Set aside, and why. See Why some contacts are set aside.
If the builder asks about first names, answer with Greet by first name or Keep as listed. If some names carry a note, such as "deceased", the same notice offers to leave those contacts out. See Greeting people by first name.
Tick the permission box: "These contacts have given the permission required to receive prerecorded voicemail messages from my business. I understand every campaign is compliance-checked before it goes out."
Select Next.
What you see
If fewer than 25 contacts are ready, a notice says campaigns start at 25 contacts with a number we can call. Next stays closed until the list is ready and the box is ticked.
Step 3: Voice and message
Select the voice row (it reads Choose a voice until you pick one). Under Who reads it, pick a voice from Your voices or House voices, set How it sounds, then select Done. See The house voices and Tone, pace and volume.
Check the mode under Message. You can still switch it here.
Write the script in Voicemail script, or start from Service reminder or Sales event. With A message for each lead, add details from your list with the buttons under the script. See Write a script people call back and Merge fields.
In the preview, select Their phone and play the take. Previous lead and Next lead move through your list. See Hear it before anyone else.
Select Next.
What you see
Over the script, an estimate of its length in seconds. Under it, a character count against the limit of 700: with a message for each lead, it reads "Longest voicemail:" and names that contact. A problem with the script shows as a notice under it, and Next waits until it is fixed. A detail that is blank for some contacts in the middle of a sentence asks you to choose Say and a word, or Say nothing there.
Clone a voice at the top of the voice picker opens the voice library, to add your voice or your team's. See Record your own voice.
Step 4: When
The day and the start time
Pick the day in Start date: from today to 60 days out.
Pick the time in Start time. The list offers half-hour starts inside calling hours.
Read the line under the fields. It says when the campaign starts, then "Everyone on the list goes out from then."
If our team reviews the campaign and the start is sooner than the review usually takes, a notice says so: choose a later day to be sure of the start.
Every campaign goes out at once, from its start time, on your business's time zone. See Choose the day and the start time and Your business's time zone.
Your campaign line and where callbacks ring
In Campaign line, choose the number every voicemail shows. It is the number a contact calls back. The menu lists your campaign line's numbers, your main number first; only your own campaign line's numbers can be shown.
In Callbacks ring, choose what a call to your campaign line rings. With ring groups on your line, the list starts with Ring groups, then One phone: your business's callback numbers. Without one, it lists your callback numbers. Your default is marked Default, and a new campaign starts on it.
To add a phone, choose Add a new number…. Cancel leaves the campaign ringing what it rang before, a ring group included. Your campaign line's own number is refused: "That's your campaign line. Callbacks need another phone." To make a group, choose Make a ring group…: your line's callback setup opens in a new tab, and the new group shows in the list when you come back.
What you see
a ring group shows as a card with its name, how many phones it holds and how they ring, for example "2 phones, all at once", and Your default when it is your default. Under it: "Every phone in" the group "rings at once, and whoever presses 1 takes the call. Groups are set on your line's Callbacks page." A group can also ring its phones in order, or as one phone.
Without a campaign line, Campaign line says so, with Get a campaign line: a campaign is sent from one of your campaign line's numbers. See What the campaign line is and Callback numbers and where calls ring.
The follow-up text
The follow-up text needs a campaign line. With one:
Turn on Send the follow-up text. It goes to mobiles only, about 7 minutes after a delivered voicemail, from your campaign line. It is included with the voicemail.
Write it in Follow-up text, up to 220 characters. Your sender details and "Reply STOP" are added for you. Add a detail to the text adds a detail from your list.
Pick English or Français.
Select Next. You confirm the list's consent to be called and texted when you sign on Review. Without permission, switch the text off.
See The follow-up text and Rules for follow-up texts.
Step 5: Review
Read each group: Campaign, List, Voice and message, When, Follow-up and Credits. Edit beside a group takes you back to its step.
Read the checks under the groups. A check that fails shows Fix it on and the step's name.
Under Sign to submit, type your Full name, sign in the Signature box, and tick the authorization.
Select Submit for review. It reads Sending to our team… while it sends.
Review and sign explains every row, the checks and the signature.
After you submit
What you see
Your campaign's name and "is in review", with the number of contacts, the file, the day and the start time. Where it stands lists Submitted, In review, Approved and Sending. Three tiles say what happens next: We review it, It is scheduled and It sends in the calling hours.
If the start is sooner than the review usually takes, Where it stands adds that if the review ends after the start, nothing goes out at that time: the team sets a new start and the email says so.
Select Go to the campaign to open its page, or Start another campaign.
See How the team reviews a campaign.
Leave and come back
The builder saves your draft in this browser as you go. Save and exit leaves it.
Your draft shows at the top of Campaigns with a Draft tag. Select it, or Continue in its menu, to pick up where you left off. Delete draft removes it.
The builder holds one draft at a time. When you come back to a draft, Start over on Name clears the draft and its list.
Good to know
The start must be at least two hours ahead, to allow for review.
Your signature, your name and the time you signed are kept with the campaign as its Sign-off record.
After you submit, the builder no longer holds the campaign. What you can change from then on is in Change or cancel a campaign.
Related
Last updated October 21, 2026
Was this helpful?